Wednesday, November 21, 2012

Thanksgiving Pre-game: Part 2: New and Improved Apple Pie

I have posted an apple pie recipe before (around the 4th of July) but since then I have played with the recipe a little and made it even better!  I have added some ingredients and taken a few away.  I hope you enjoy this version of apple pie as much as I do!


I always make the filling first followed by the crust. 

Ingredients:

Filling:

3/4 cup sugar
2 Tablespoons cornstarch
1/2 teaspoon ground cinnamon (I make it a heaping teaspoon)
1/8 teaspoon allspice
1/8 teaspoon nutmeg (optional)
1/8 teaspoon ground ginger (optional)
6 cups diced (bite sized) apples (today I used a combination of granny smith and gala)

Crust:

1/2 cup soy flour, tapioca flour, white rice flour, and sweet rice flour
1/2 teaspoon salt
2/3 cup butter or shortening
6 to 7 tablespoons cold water
milk
sugar

Directions:

1.  Pre-heat the oven to 375 degrees

Filling:

1.  Dice all the apples into bite-sized pieces (I left the skin on it is colorful and delicious)


2.  Mix apples well with the cornstarch, cinnamon, allspice, nutmeg and ground ginger


3.  Set aside

Crust:

1.  Whisk together the flours and salt
2.  Cut in butter with a fork (there should be pea-sized pieces of butter and flour in the bowl)


3.  Add the cold water and mix well (I usually end up using my hands)
4.  Divide the dough in half
5.  Using two sheets of wax paper and a rolling pin roll out enough dough to cover the bottom and sides of the pie plate


6.  Add the apple mixture to the pie plate (make sure the apples are evenly distributed so they cook evenly a.k.a. don't leave the apples in a heap)


7.  Again, using two sheets of wax paper and a rolling pin roll out the dough large enough to cover the top of the pie


8.  Cut away excess dough and use to patch any holes
9. Cut slits in the top of the pie
10.  Brush with a little milk and dust with sugar
11.  Bake for 35-40 minutes or until apples are well done and the crust is golden brown


Thanksgiving Pre-game: Part 1: Chocolate Cake with Vanilla Butter Cream Frosting

I love Thanksgiving, mostly because I love to eat and I can eat as much as I want on Thanksgiving without being embarrassed (it is what you are supposed to do right?).  This year we are going to have 7 guests (plus a new baby) and I wanted to get a jump on cooking.  I made the desserts today because they will still be delicious tomorrow.  Tomorrow I will be making the turkey (23 lbs!), stuffing, mashed potatoes, fried corn, green beans, popovers, and gravy.  (Look for new posts all day). 


This is my go to chocolate cake recipe.

Ingredients:

Cake:
2 cups sugar
1/4 cup plus 3 Tablespoons white rice flour, sweet rice flour, tapioca flour, and soy flour
3/4 cup cocoa powder
1 1/2 teaspoons baking powder
1 1/2 teaspoons baking soda
1 teaspoon salt
2 eggs
1 cup milk
1/2 cup vegetable oil
2 teaspoons vanilla
1 cup boiling water

Frosting:

1/3 cup butter (softened)
4 cups powdered sugar
1/4 cup milk
1 1/2 teaspoons vanilla

Cake:
1.  Pre-heat the oven to 350 degrees.
2.  Grease and flour 2 (9in) round baking pans


3.  Stir together sugar, flours, salt, cocoa, baking powder, and baking soda


4.  Add eggs, milk, oil, and vanilla
5.  Beat with an electric mixer for 2 minutes
6.  Stir in boiling water (the batter for this cake will be thin!)


7.  Pour into greased and floured pans
8.  Bake for 30 35 minutes or until a wooden toothpick inserted into the center comes out clean
9.  Cool for 10 minutes then turn out of pans to continue to cool on wire racks (sometimes I turn them out onto a plate)
10.  Cool Completely!


Frosting:
1.  In a large bowl beat butter with an electric mixer until creamy
2.  Add 2 cups of powdered sugar and beat with electric mixer until combined
3.  Add milk and 3rd cup of powdered sugar
4.  Add 4th cup of powdered sugar and vanilla, beat until smooth
5.  Add milk if needed


I decorated this cake with peanut butter chips, chocolate chips, and some Hershey Kisses.  I think it came out really festive!


Thursday, November 15, 2012

Requests

Last night I taught my very first gluten-free cooking class at a local cooking store.  It was by far the most fun I have had "working".  In the class we made an apple pie, a chicken pot pie, popovers, and chocolate cake.  Everything turned out to be very delicious and I sincerely hope that I was a help to anyone in the class.  I know that gluten-free food can be delicious and my entire goal was to teach everyone there last night and anyone who reads my humble blog that gluten-free food can be wonderful.

Next week, I am going to be posting what I am calling my "Thanksgiving Special".  I am going to include a stuffing, popovers, and a couple of other side-dishes that my family will be enjoying that day. 

After Thanksgiving I will have a pretty long (and much needed break from my graduate  school work) and I would love to here from some of my readers any requests that they have as far as recipes or questions or whatever!  So please e-mail me or leave a comment and I will try to come up with a great recipe or answer to your question. 

Saturday, August 11, 2012

Delicious Gluten-free Chicken Stir-fry

This is one of my go-to recipes when I need to feed a lot of people or want to have left-overs to take to work for lunch.  It is very easy and very tasty.


Ingredients:

1 1/2 lbs. of boneless and skinless chicken breasts (diced)
2 egg whites
4Tablespoons water
4 Tablespoons cornstarch
1 1/2 cups carrots
1 1/2 cups green beans
1 cup chicken broth
2 Tablespoons gluten-free soy sauce (CHECK LABELS!)
2 Tablespoons gluten-free hoisin sauce (CHECK LABELS!)
Vegetable oil
4 cloves minced garlic
2 teaspoons powdered ginger
sesame seeds

1.  Whisk the egg whites,  and 2 Tablespoons of cornstarch together to create a marinade for the diced chicken
2.  Toss the chicken in the marinade, cover and refrigerate for an hour or more
3.  Cover the bottom of a wok or skillet with oil and add the chicken stirring slowly until cooked through
4.  Transfer the chicken to a plate
5.  Add the garlic and vegetables (Add the vegetable that will take longest to cook first)
6.  In a small bowl whisk together the remaining cornstarch, chicken broth, powdered ginger soy sauce, hoisin sauce, and 2 Tablespoons of water
7.  Add the sauce to skillet and cooking vegetables
8.  Re-add the chicken and cook until all the vegetables are cooked through
9.  Garnish with sesame seeds and serve over rice


*This dish can be made a number of ways by switching the meat and vegetables.  It is hard to mess up so add what you like best.

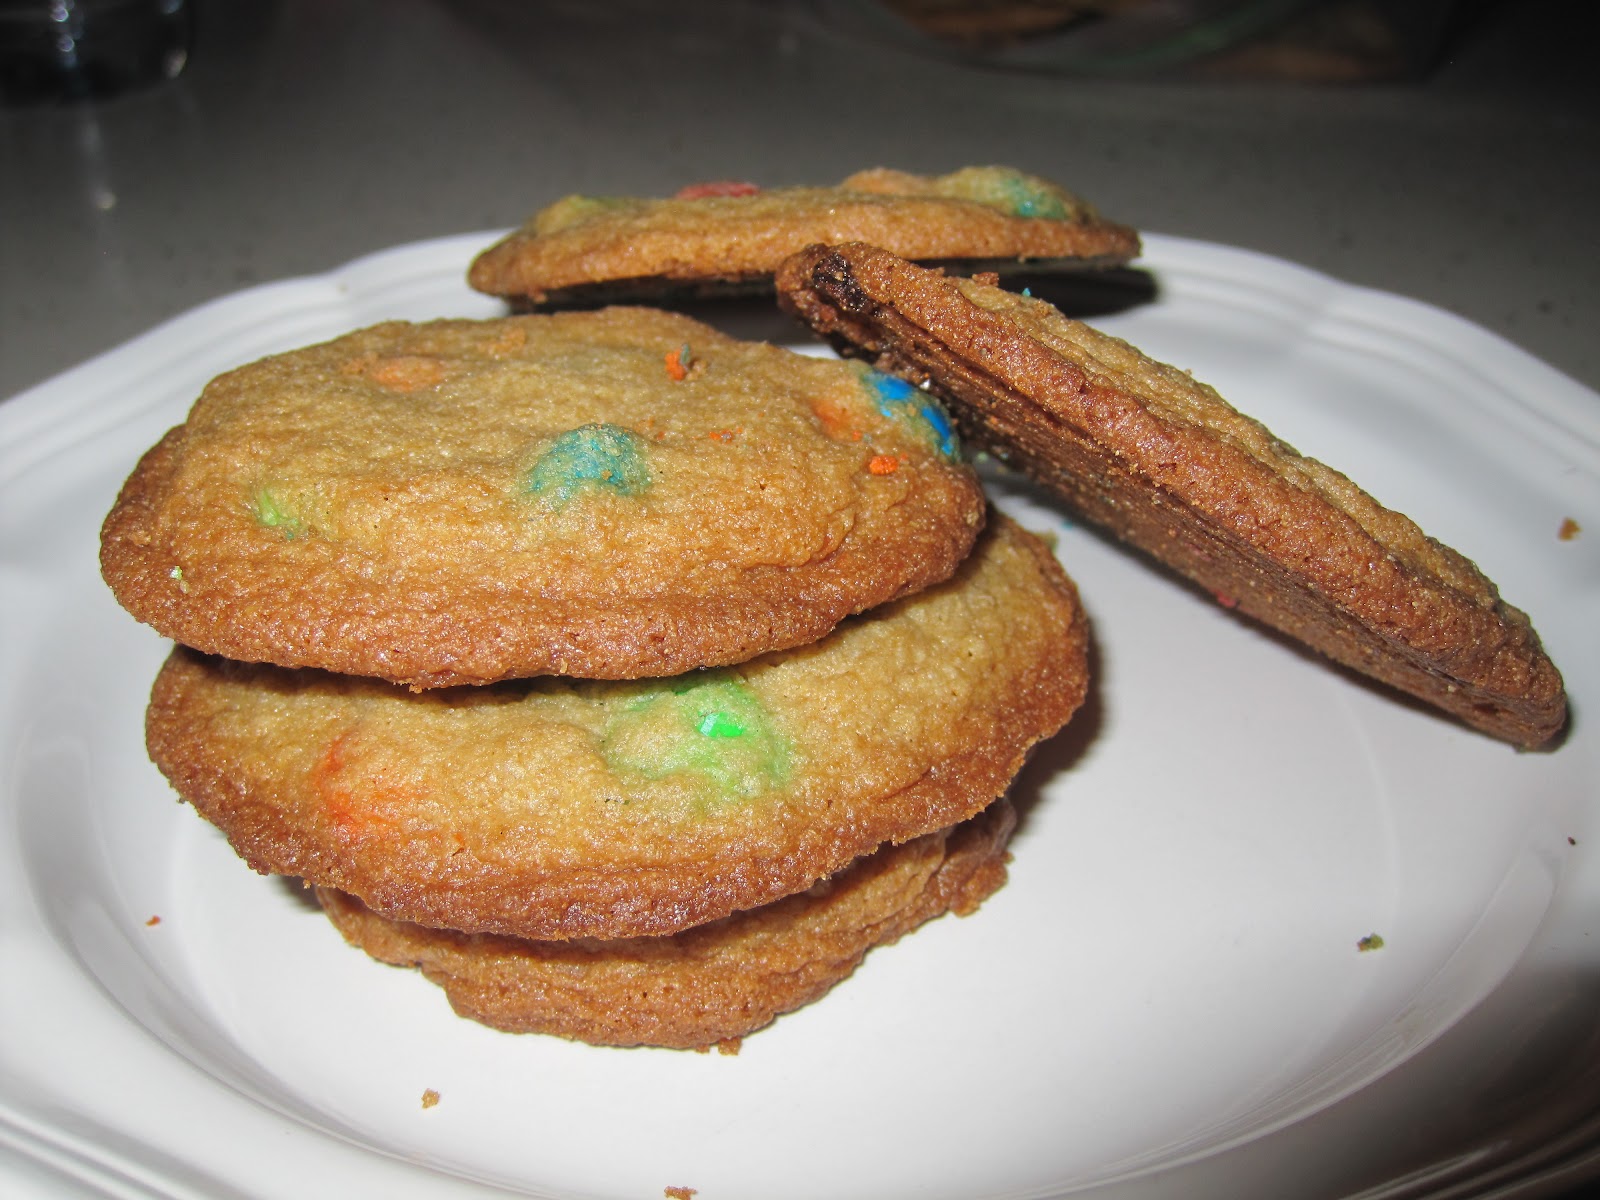
Homemade Gluten-free M&M Cookies

I think that this blog is a pretty good picture of how much I love to bake, especially sweets.  We had some guests this week and I wanted to make a treat that wouldn't take much time or leave the oven running for very long.  I haven't made M&M cookies in a long time so that is what I decided to make.  The dough for these cookies is different from regular chocolate chip cookies but it is pretty much the same concept and just as easy to make.


Ingredients:

2 sticks or 1 cup butter softened
1/2 cup brown sugar
1/2 cup sugar
1 egg
1 teaspoon vanilla
1/2 teaspoon baking soda
1/8 teaspoon salt
1/2 cup of soy flour, white rice flour, sweet rice flour, and tapioca flour
2 cups M&Ms

1.  Pre-heat oven to 350 degrees
2.  In a large bowl cream the butter and sugar together using a mixer
3.  Add the egg and vanilla
4.  In a medium bowl whist together the flours, salt, and baking soda
5.  Add the dry mixture to the butter and sugar mixture slowly and stirring thoroughly
6.  Add the M&Ms and stir until well combined
7.  Bake for 10-13 minutes until golden brown
8.  Cool on a wire rack

*Store in a sealed container for up to a week.

Easy Gluten-free Biscuits

Making breads is probably the biggest challenge to cooking gluten-free.  This is the second time I have tried to make biscuits and this recipe worked better than the first.  These biscuits were truly delicious and easy to make.


Ingredients:

1/2 cup soy flour, sweet rice flour, tapioca flour, and white rice flour
1 Tablespoon baking powder
2 teaspoons sugar
1/2 teaspoon cream of tartar
1/4 teaspoon salt
1/2 cup shortening
2/3 cup milk

1.  Pre-heat oven to 450 degrees
2. In a large bowl whisk together the flours, baking powder, salt, sugar, and cream of tartar
3.  Use a fork to cut in the shortening
4.  Add the milk all at once
5.  Stir until the dough clings together
6.  Spoon small amounts of dough onto a cookie sheet leaving room for the biscuits to expand a little
7.  Bake for 8 to 10 minutes or until golden brown


*Serve the biscuits warm
**Store in a plastic bag or container for a few days

Sunday, August 5, 2012

Brats and Potatoes on the Grill (A perfect meal in the heat)

It is finally summer in Seattle.  I have waited for months to have nice weather on a kind-of consistent basis.  The only downside to all of this nice weather is the heat and humidity that comes with it.  Unfortunately our little house does not have air conditioning.  The heat makes me want to have it installed just to have for the couple weeks a year we actually need it. 

Since it has been so hot I have been avoiding turning on the stove or the oven.  Tonight, we decided to grill some brats.  I didn't want to turn on any part of the stove or oven so I also made potatoes on the grill and cooked some frozen corn in the microwave. 

When you buy brats make sure to look at the labels carefully.  Just like hot dogs, they can contain gluten.  A good place to start the search for a good gluten-free brat is online.  Most companies post allergy information.  I did not do anything special to the brats, I just put them on the grill to cook until they were nice and brown and hot all the way through.


 For the Potatoes:

Ingredients:

3-4 potatoes (I used red)
salt and pepper
butter
onion (small)

1.  Peel the potatoes and slice
2.  Place the cut potatoes in equal parts on one or two large pieces of tinfoil
3.  Dice the onion
4.  Add the onion and salt and pepper (to taste) to each of the foil packets
5.  Add a couple Tablespoons of butter to each packet
6.  Fold the foil to create a sealed packet
7. Place on the grill for 20-25 minutes or until potatoes are cooked through (My dad likes to cook them a little longer so they get crispy)
8.  Remove from foil and serve (Spoon the potatoes out of the packet leaving the excess butter behind)


*Depending on taste you can used more or less butter.  I like my potatoes buttery but my husband likes a little less.

**Be creative you can add a variety of spices and flavors to make these potatoes your own.  Sometimes I add a little rosemary or garlic.  It is an easy dish that you can make your own.